How To Create A System Image in Windows 8.1
Yes, a System Image backup is still available in Windows 8.1. Yes, Microsoft did hide it pretty well. With cloud storage becoming prevalent, Microsoft is moving (pushing?) users away from the conventional PC backup. Only a few years ago, everyone was encouraged to keep meticulous backups. In the event of a drive failure or a particularly insidious virus, unless you had good backups, your data was lost. Microsoft’s current idea is that users should be storing their documents, pictures, music, etc. in the cloud. If you lose a hard drive or have some other type of failure, the OS can be restored, legacy programs re-installed (Cloud Apps require little if any installation), and you can find everything else you need in SkyDrive, Google Drive, DropBox, etc. It sure does sound nice, doesn’t it?
Don’t get me wrong, I rely on the cloud heavily. I store as much as possible in Google Drive. I use Google Docs exclusively, I haven’t used Microsoft Office in years. However, whether it’s out of habit or laziness, I still have files on my desktop. I have PDF files that haven’t quite made it to Google Drive. I have notes that were typed in Notepad that I haven’t put into Evernote yet. I have archived files from an old computer that I haven’t moved to my NAS storage. In other words, I still need good backups (and to optimize some of my workflows!).
In addition to backing up with the [intlink id=”7025″ type=”post”]Windows 8 File History[/intlink] feature, which works well and allows you to easily [intlink id=”7091″ type=”post”]Restore Your Files[/intlink], I like to create an entire System Image once per month. Let’s look at how that is done in Windows 8.1.
Begin by opening the Control Panel and then clicking on File History. In the lower left hand corner of the File History window, you’ll see System Image Backup.
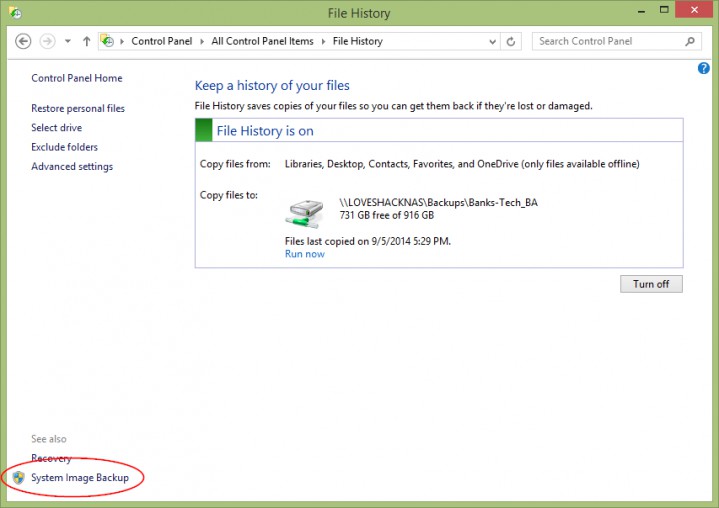
When you click on System Image Backup, a new window will open and you’ll be presented with three options for where you’d like to store your system image.
- On a hard disk
- On one or more DVDs
- On a network location
Note: You cannot store a System Image on your System or C: drive. You will need a second hard drive or an external hard drive.
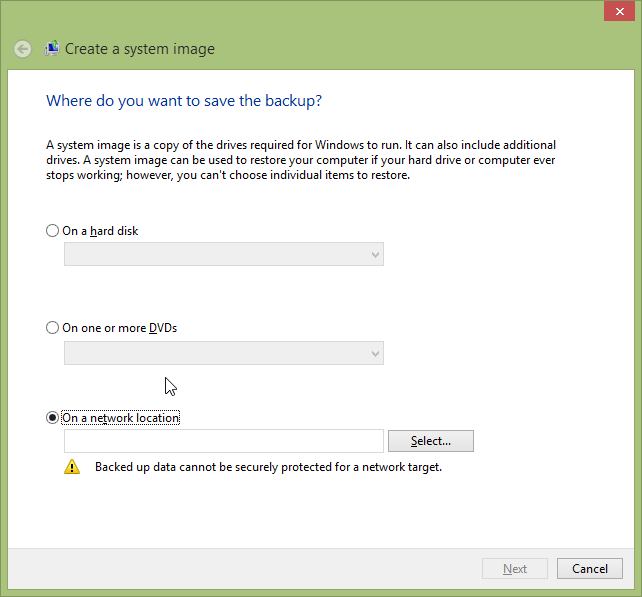
How To Store A System Image On A Network Location
To store your system image on a network location, select the appropriate radio button and then click Select to browse for the location. You may also need to enter network credentials to connect to the device.
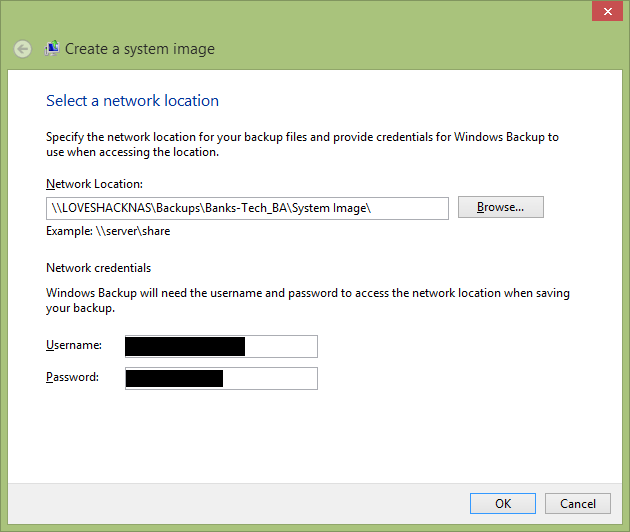
Click OK and then you’ll be back at the initial Create A System Image window, with the network location filled in.
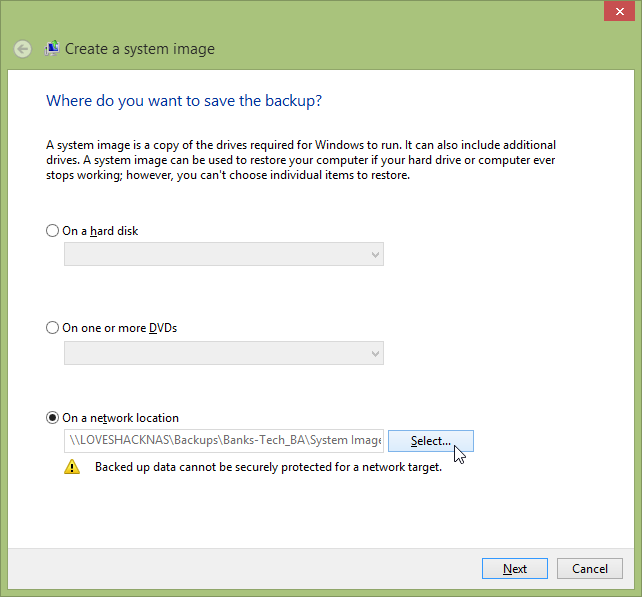
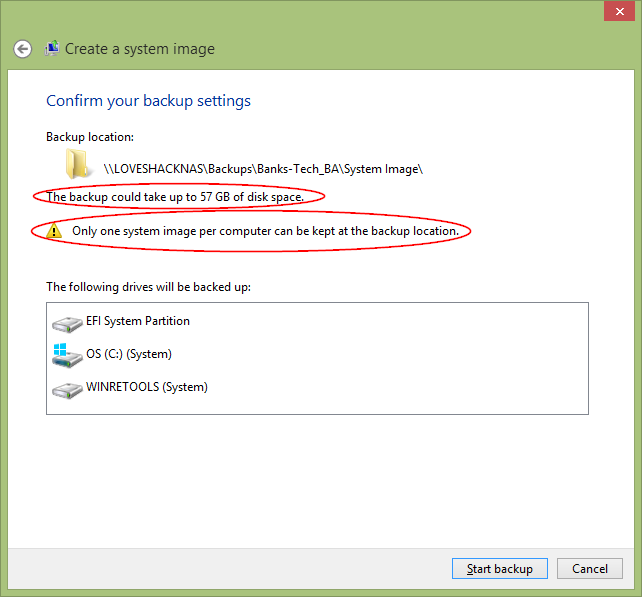
Click Next and you’ll be presented with a screen confirming all of your settings. This screen will also give you the approximate size of the System Image. Click Start Backup and Windows will begin creating the System Image. Note: Windows will not allow more than one System Image per disk. If there is an existing System Image on the disk you are trying to backup to, you will need to delete it before creating a new one.
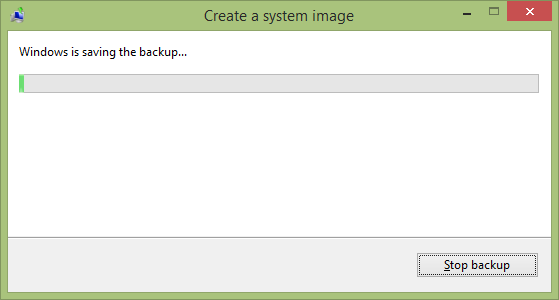
Finally, you’ll see a Create A System Image window with a status bar indicating the progress. The System Image backs up everything on your computer, as a result the files can be very, very large. If you are backing up to a network location, I highly suggest you use a wired (instead of wireless) connection to your network and give your computer overnight to complete the task.
What questions do you have about creating a System Image? Please post in the comment section below and I’ll do my best to answer your questions.
[content_band style="color: #333;" bg_color="#78a22f" border="all" inner_container="true"] [custom_headline style="margin-top: 0;" level="h4" looks_like="h3"]Join Us At #BanksTechTips[/custom_headline]Be the smartest guy or gal in the room. Receive our best Tips, Tricks, and Tutorials absolutely free.

